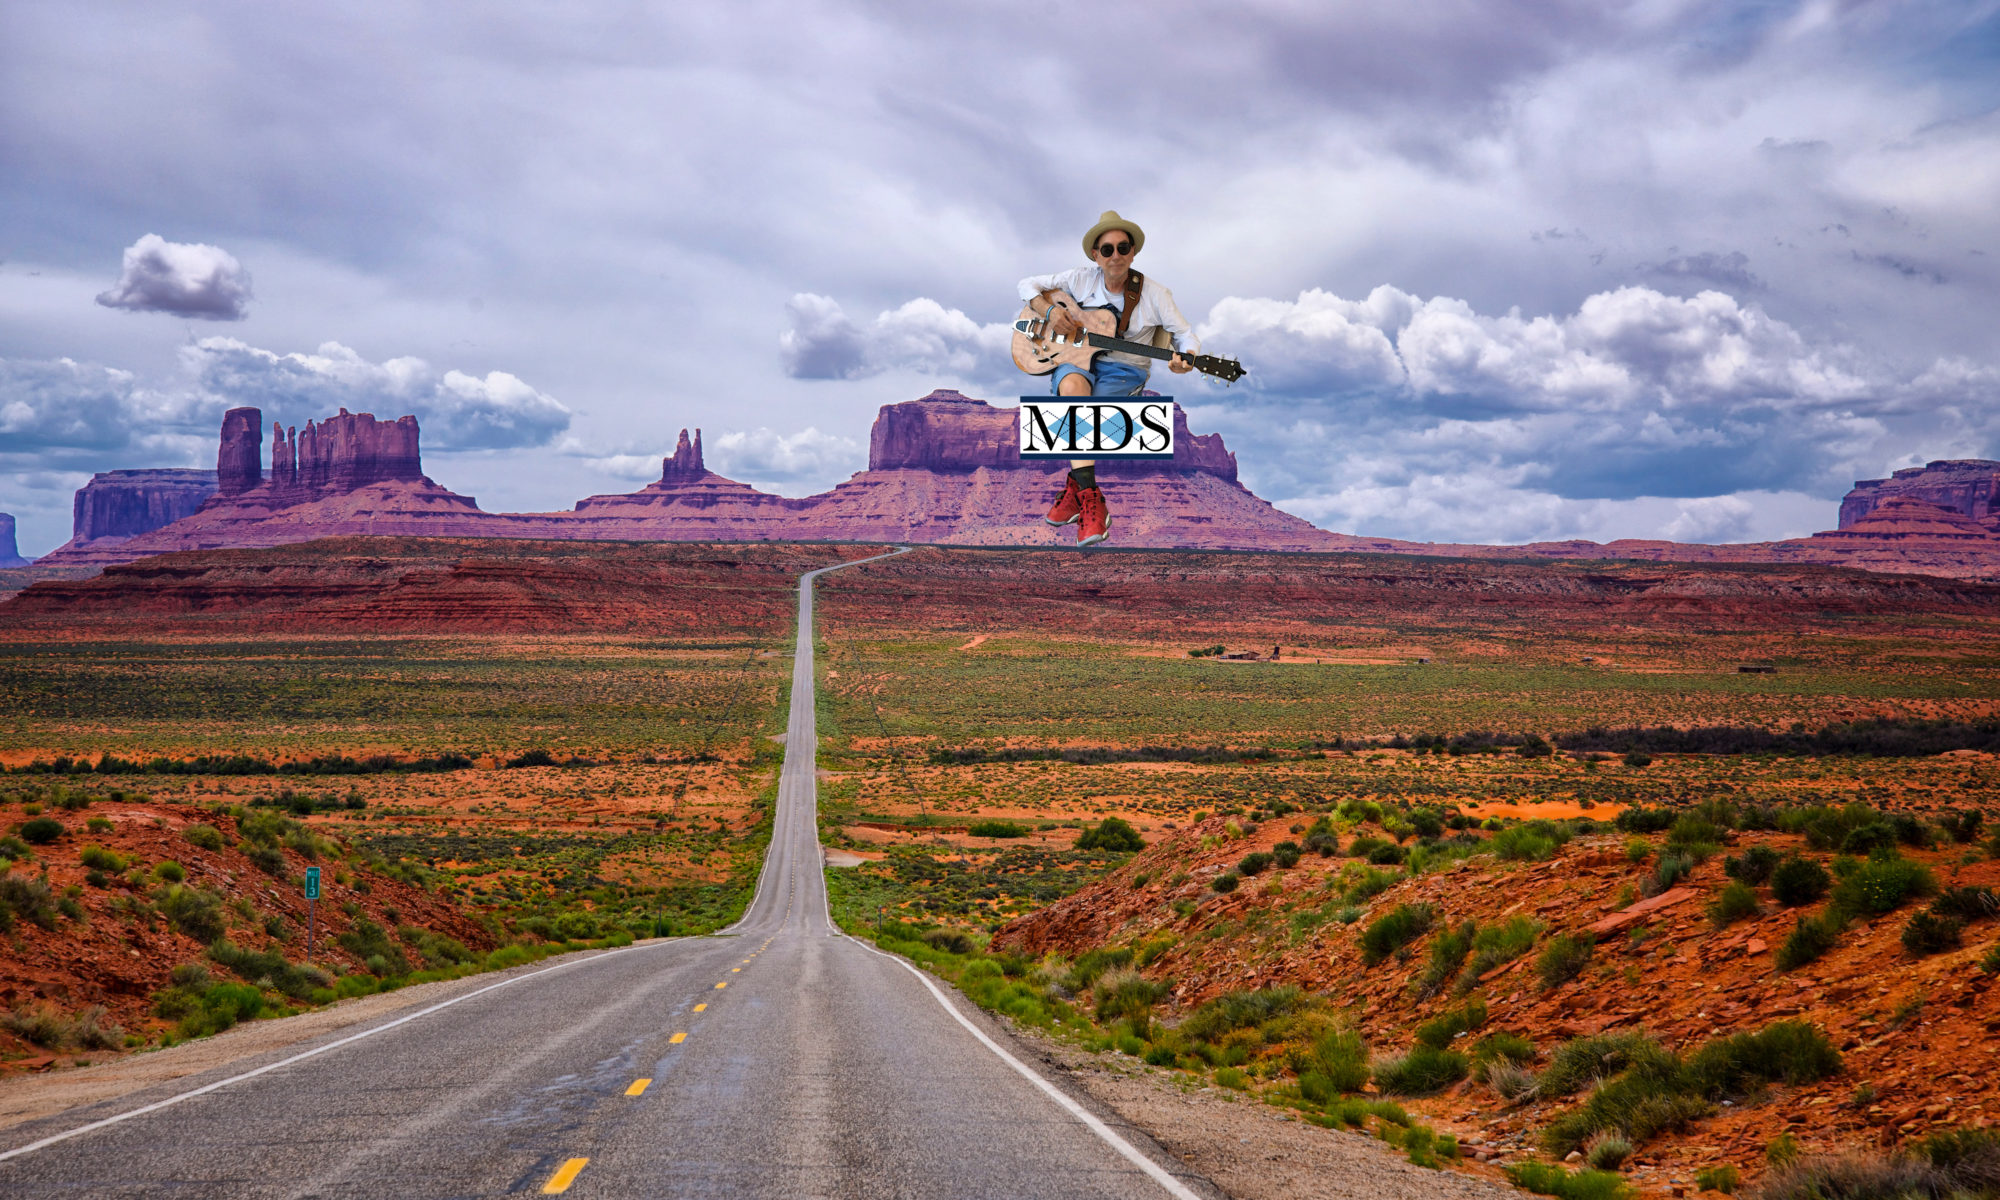
With mass vaccinations of Iowans occurring daily, by most visible measures life is slowly returning to pre-pandemic normal. Though masking is still a prevalent and required, people are involving themselves in old routine behaviors like eating at restaurants, visiting coffee shops, and in the case of this posting, attending musical events such as Open Mic Night! We had the great good fortune of access to a most excellent coffee shop, Cup of Joe in Cedar Falls, to host such an event.
The Conditts perform at Open Mic Night
My friend Grant Tracey and I hosted our first Open Mic Night together this past Friday evening, May 7, 2021. In a previous blog posting I wrote in some detail about the technical aspects of hosting an Open Mic scenario, particularly the use of a Bose L1 Pro 32 PA system.
To the left you can see the general set-up situated in the rear of the coffee shop. Between the two performers, on the floor, you will note the Bose subwoofer, the line array speaker tower and hidden behind the singer a T4s mixer that all comprise the PA system. The Bose 32 is spec’d for a larger space than the coffee shop so it easily performed admirably without stress and filled the room with a pleasant level of performance sound. Audio level adjustments of volume, bass, treble and reverb were easily executed. Audience members commented positively on the quality of the sound, which was a relief to me since I personally invested in all the PA hardware. You’ll also notice guitar and mic cables everywhere, stools, mic stands, guitar pedal boards, guitars, and guitar and music stands.
The fact is, there was a great deal of schlepping to get the performance space properly set up. Even though the Bose PA is valued for its portability, by the time you pack in the PA, cables, stools, mic stands, guitars, guitar stands, and guitar pedal boards, its quite an effort! You can see below, in the image of me performing, all the surrounding support hardware required to pull off the event. At first glance, it might not seem like a lot, but it was a lot to haul from home, and then get from the parking lot into the coffee shop. I am grateful that we planned to take 90 minutes to get set up for our first time, and we needed every minute, considering that Grant had to make an emergency run back to my home to fetch a music stand and my iPhone which contained a Bose app to remotely control PA sound quality.
Me and my Collings I-35 knocking out my first set…
I would make the following preliminary conclusions regarding the Open Mic set up to consider before Grant and I do it again:
Get to the Coffee Shop early, because set up takes time. I still think we need 90 minutes. Perhaps we will be able to streamline matters in the future, but we’re not there yet.
Contrary to my above assertion, as advertised, the Bose L1 Pro 32 snaps together very quickly and gives solid performance. Its the routing of mics, guitars and pedal boards that take extra time.
It seems to me easiest to use the 3 channels available on the Bose L1 power stand because the sound quality can be easily manipulated using the Bose app on my iPhone. The app allows me to wander anywhere in the coffee shop to check sound level and tonality and easily adjust it where I stand. With a variety of performers using different guitar types and styles, quick and easy adjustments of sound are of great value.
That first night we set up three mics, but I think two is enough. Dropping to two will save time, space, and reduce cables.
The two guitar channels and a mic will run off the power stand. An additional mic can be routed through the T4s. This set-up is not written in stone.
I do not think we need 2 stools and am thinking one is enough.
It is my understanding that there are music stands in the basement of the Coffee Shop, so we do not need to haul one in on Open Mic night.
Grant Tracey and his Les Paul playing his set…
All in all, it was a good night. I’ve seen the coffee shop more crowded on previous Open Mic nights, but there are still some residual pandemic fears keeping people away, and there was an outdoor music venue in operation around the corner, down the street, which was drawing people in. Nevertheless, we had a respectable audience for our initial First Friday Open Mic night.
To the right, you can see fellow host Grant Tracey playing through his set. One of the perks of hosting Open Mic is the chance to play your self and depending on the number of performers who sign up, you may get to play even more.
Playing my National Reso_Lectric in a second set…
In the end, both Grant and I squeezed in two sets each. Anticipating that I might have the opportunity to play more than the standard 15 minute open mic set, I brought along two guitars, both of which made their first public appearances: my Collings I-35 Semi-Hollow bodied electric and my National Reso-Lectric, as seen with me on the left. In addition to the guitars, making a first public appearance, I, for the first time sang publicly. Ever since, Mrs. Silliman, in the 3rd grade, tossed me onto the “inadequate singer” refuse heap when sorting students for participation in grade school chorus, I’ve believed my singing voice somewhat suspect; however, with the encouragement of my wife, Annette, and others I decided to give it a go. Playing finger-style Travis picking technique is also a challenge when trying to sing simultaneously; however, after 5 years of concentrated dedication to guitar playing, I finally broke through this Spring and was able to play and sing simultaneously, which is no mean feat for me!
Here was my playlist:
Set One
If I Needed You – Townes Van Zandt
Long Distance Call – Muddy Waters
Pancho and Lefty – Muddy Waters
Vigilante Man – Woody Guthrie (arranged by Ry Cooder)
Set Two
Paris, Texas – Ry Cooder
You Got to Move – Mississippi Fred McDowell
Railroad Bill – traditional (arranged by Tom Feldmann)
Corrina, Corrina – traditional (arranged by Stephen Grossman)
Baby, Please Don’t Go – Big Joe Williams
Annette was kind enough to film a couple of my tunes… you can view one below, warts and all… I dropped a few notes along the way. This was my rendition of Muddy Waters’ “Long Distance Call.” A bottleneck tune played in standard tuning… You will note that the Coffee Shop was quite noisy and I found it a bit of a distraction, but powered through…
Steve Surles, waiting his turn to play at the Open Mic
If all goes as planned, I will be hosting First Friday Open Mic in June on the 4th. My regular co-host Grant, to my chagrin, is tied up with a local theater engagement, so Steve Surles, who also played the open mic with us on the first night, has volunteered to guest co-host in June. Hopefully too, my son Parker will come back from college in Iowa City to help haul equipment and listen-in which will be a great delight for me! See you then!
Good Morning Little School Girl… I love this tune… it’s considered a blues standard and resides in the Blues Hall of Fame as of 1990… Sonny Boy Williamson is credited with having recorded it first in 1939, but as with many blues tunes, original authorship can be a bit foggy… Williamson’s tune is believed to be a reworking of Son Bonds’ Back and Side Blues… The melody of Bond’s tune and Williamson’s are very, very close…
Here’s Bonds’ original Back and Side Blues…
https://youtu.be/3QJYeNNJOt0
And here’s Williamson’s original 1939 Hall of Fame version of Good Morning Little School Girl…
Though backed up by a pair of guitars, Williamson’s version is dominated by his harmonica, for which is most well known… The first version I remember hearing was recorded by Muddy Waters and in this version, his guitar playing carries the tune:
What struck me besides Waters’ masterful guitar playing was the Rolling Stonesesque lecherous nature to the tune… Basically an adult male chasing after an underage girl reminiscent of Jagger and Richards’ Stray Cat Blues, which is equally nasty… Here is the opening stanza of Good Morning Little Schoolgirl:
Good morning little school girl
Good morning little school girl
Can I go home with
Can I go home with you?
Tell your mother and your father
I once was a schoolboy too
Wicked… nasty… not politically correct… but so bluesy… love it…
After hearing Muddy Waters’ version of the tune, I thought how fun it would be to learn it and I was delighted that Stef Grosman included the tab and lessons in his Bottleneck Blues Guitar DVD. Grossman based his arrangement on Fred McDowell’s interpretation of the tune. I really like McDowell’s version… his guitar playing is clean and penetrating and his slide vibrato is perfect…
I do not like to sing when I play… I am guitarist, so I tend to learn tunes that sound decent when played as an instrumental and Good Morning Little Schoolgirl fits the bill… I also tend to favor playing the tune a bit slower and “swamping” it up…
When I was shopping for my Reso-Lectric at Dave’s Guitars in LaCrosse, WI one of the store guys approached me and told me how much he likes my swampy play as compared to so many others who rip through slide pieces when trying out guitars in the store… He compared me to Ry Cooder’s Paris, Texas Soundtrack… I was a bit taken back because I am not in the same galactic dimension as Ry Cooder, but the compliment was encouraging…
Here’s my version:
There’ve been a bajillion cover recordings of this tune, like the poppy, somewhat inane version by the Yardbirds, or the long jam version by the Grateful Dead, or Taj Mahal’s own idiosyncratic take, which you can see below:
Finally in closing, I will remind all that country blues is the foundation upon which rock and roll music stands and these old tunes are often reinterpreted in a variety of way… here you can see the great Alvin Lee of Ten Years After ripping out a version of School Girl…
Hybrid Acoustic/Electric National Reso-Lectric is a Singular Guitar
National Reso-Lectric
A couple of weeks ago I made the trek across Iowa and Minnesota farm land to Dave’s Guitars in LaCrosse, WI and purchased a new resonator guitar. I traded in a steel bodied National NRP Black Rust for a National Reso-Lectric.
I’ve played the Reso-Lectric quite a bit during the past two weeks and have conjured up my review of the guitar. There are just a very few reviews of this guitar out there on the web probably because there are not that many Reso-Lectrics out in circulation. The only “celebrity” musician I found by googling around who’s played one publicly is Metallica’s James Hetfield and that was revealed with only a single still image and that’s it. It should be noted too that Hetfield’s Reso-Lectric is the all mahogany version referred to as the Revolver.
I’ve seen suggestions out on the web that this guitar is capable of playing in overdrive/distortion mode but that is NOT my intension. I play finger-style country blues and as far as I am concerned the Reso-Lectric is a pickup enhanced acoustic resonator designed for country blues and bottleneck/slide playing and that’s how I am going to use it.
The Reso-Lectric is not the only National Resonator I own. I also play a Reso-Rocket WB (wood body). It’s a fantastic guitar that is equipped with one of Mike Dowling’s Hot Plates as a pickup. As wonderful as the Reso-Rocket is, it does not offer the sound palette that the Reso-Lectric brings to playing the blues.
Let’s examine the physical nature of the guitar first and then explore what it sounds like in some of its various modes. Let’s follow the string-line from tailpiece to tuning posts and see what the Reso-Lectric is…
On first view, it is a combination of stunning and unusual in appearance… a remarkable and unlikely looking guitar. Enhancing the singular appearance of the guitar is the sunburst treatment of the figured maple top, upon which the polished resonator cover rests, the art deco logo on the kitchen counter plastic cover and the 1950’s era sci fi nuclear reactor pick up control dials. Finally, the headstock is treated with a mother-of-pearl veneer cap, gleaming retro Kluson tuning pegs and capped off with another art deco National logo.
Examination of the back of the guitar indicates a nice solid block of mahogany serving as the guitar’s foundation and mounted to the body is a figured maple neck, which as with the rest of the exposed wood on the guitar has received a satin finish. The necks on all my other guitars are mahogany with a gloss finish, so this neck is taking some getting used to for me. The neck appears to be attached to the body with screws, which makes me a bit anxious. I would feel more comfortable if they were bolts… perhaps they are, but I am not willing to pull one to find out. I did have to gently snug them up as they were not all-the-way tight.
Also on the back, you will note a screwed on battery cover. Six wood screws are required for removal to get into the battery compartment where two 9 volt batteries are housed to power the guitar’s Fishman preamp. My Taylor acoustics and the T5z all require 9 volt batteries but only one. The Reso-Lectric is a power hungry thing. Leaving the guitar plugged into an amp when not in use will drain the batteries, so unplug…
At the base end of the guitar the characteristic National tailpiece is locked into place with a strap mount button. On my other heavier guitars like the Taylor electrics, I have changed out the stock strap buttons for locking Schaller’s. Given the relatively beefy 8 lb (3.6 kg) weight, I think it would be prudent to have strap locks on this guitar at some time in the near future.
From the end of the tailpiece the strings traverse under the polished hand rest and are then situated into appropriately sized grooves cut into the guitar’s bridge, which for National resonator’s is most commonly referred to as the biscuit. The biscuit/bridge is comprised of two pieces of wood glued together: a circular horizontal piece that is glued to the metallic resonator cone and a vertical slice of wood with grooves cut into it to guide the strings like a guitar bridge. The whole enterprise, biscuit bridge and resonator cone are covered with a shiny and elaborate hubcap-like cover, which is very characteristic for resonator guitars.
When the strings are plucked their energy is transferred to the biscuit/bridge which downwardly vibrates the spun aluminum convex shaped cone which serves as a speaker and radiates sound outward creating the characteristic bonk and splang for which resonator guitars are known. Most importantly, for this guitar there exists a piezo pickup which is mounted in the lower part of the biscuit bridge, the signal which captures the sound emanating directly from the cone is sent to a Fishman preamp located under the volume control knobs in the upper bout of the guitar. The piezo is one of two ways in which the guitars sound is amplified.
Following the string-line past the biscuit/bridge and up towards the neck of the guitar, the strings flow over another electric pick-up. Covered in black plastic is a Lollar P-90 single coil pick-up. I believe this version is referred to as a “Soap Bar.” So, in sum, this guitar has two pick-ups available to sculpt its sound. One below the biscuit/bridge and the other located at the sweet spot just below where the neck joins the body of the guitar.
Control of volume and tone knobs are located on the top of the upper bout of the guitar. There is a toggle switch to move between the two pick-ups for individual selection, or the center setting will deploy both simultaneously. Unlike a lot of electrified guitars, this one does not have a tone control; however, tone control is managed really well in my judgement by blending the volume of the two disparate pickups.
So what do we have here for controls besides the pickup toggle? Referring to the image of the controls, the one positioned lowest is overall volume control. The middle switch controls the output of the under biscuit/saddle pickup and the uppermost control does the same the P90 pickup. The sounds offered by the two different pickups are distinctly different so it is possible to create a wide array of sonic possibilities by playing the pickups individually or by blending them through control of output. I will revisit this subject a bit later with some sonic examples.
After crossing over the neck pickup the string line advance along the ebony fretboard mounted on a maple neck. The fretboard is marked with inlaid dots, is 14 jumbo frets long off from the guitar’s body, with a longish scale length of 25 21/32 inches (65.2 cm). The strings finally arrive at the headstock, passing over the bone nut with a width of 1.73 inches (4.4 cm) which is fine for both slide and finger-style playing. The strings end their journey on the posts of Kluson tuners, which are elegant appearing and smooth operating.
I’ve included below are some sound samples for the National Reso-Lectric. I play a opening section of Blind Willie McTell’s Wake Up Mama with the guitar’s pickups set three different ways:
First I play Wake Up Mama with the biscuit/bridge piezo pickup engaged alone:
Biscuit/Bridge piezo pickup alone
To me, the biscuit bridge pickup alone sounds the most acoustic. Of the two pickups, I think the one on the bridge also has the most bite, which is typically true of most bridge pickups on electric guitars. I am not inclined to play the bridge pickup alone as it comes across to me as a bit thin and tinny sounding which does not appeal to my ears.
Second, I play the same tune with the neck pick only engaged:
Neck pickup alone
The neck pickup alone demonstrates, by comparison to the bridge pickup, a warmer, rounder, fatter tone which is also consistent with other electric guitars. I like the tone of this pickup but used alone it just lacks a modicum of bite that would make it most appealing to me, especially for a resonator guitar.
In my judgment, the best way to play this guitar and to elicit from it the most lovely tones it is capable of is to mix together the output from both pickups simultaneously. What I would call the Goldilocks tone. I tend to balance the tone more towards the warmer neck pick up but dose in enough bridge sound to add some edge. Let’s take a listen:
The first time I ever played a resonator, it was one of those moderately priced Fender wooden jobs and it was fun to play finger-style, especially my genre of choice, country blues, but it did not feel like a particularly substantive, quality instrument, so I decided to go top drawer and get a National NRP Black Rust for my own.
I’ve written about this before several times on this blog, that the NRP was pretty much a fine guitar for bottleneck playing, but for me it was basically unplayable finger-style because of the way it was set-up with very high action. I am delighted to report in this review that the Reso-Lectric is mac easier to play finger-style. Below I run through one of my favorite country blues finger-style tunes, Cocaine Blues (as arranged by Stef Grossman).
In the past I’ve purchased guitars and suffered from buyer’s remorse of varying levels but no so in the case of the National Reso-Lectric! For the genre and style I like to play it is a perfect complement to my guitar collection.
As a final note… National provides as nice a guitar case as I’ve seen… solid, sturdy, well padded and the guitar fits snugly into its place. Still… even so I would not check it through an airline! I don’t know how they do it but National managed to embroider a logo onto the top of the case… so cool…
Love this axe…
Please let me know what you think of this review and hit the follow button too!
Last week, I wrote in this weblog about my experience in La Crosse, WI at Dave’s Guitars when I purchased a new hybrid acoustic/electric National Reso-Lectric resonator guitar. What I did not mention was the brief conversation I had with JR, the sales rep I worked with about the age of the strings on the instrument I was procuring. He thought the guitar had only been in stock about 3 months since last November, but threw in a set of new strings he thought would work on the guitar as part of the deal…
As part of my own due diligence I followed up with National and asked them if they knew when the guitar was built to get a better idea of the extant string age. National was great and got back to me quickly. The guitar was actually built in August 2018 and delivered to Dave’s that very month. The fact was, the guitar was probably hanging on a hook at Dave’s 19 months instead of three! So, the strings surely need changing. It also explains why the guitar was a bit grubby when I initially decided to purchase the thing. JR did a nice job cleaning it up but there was still some junk adhering to the fret board that I needed to get clean off.
A set of John Pearse Jazz Mediums…
As further due diligence, I ran down the recommended string sizes for the Reso-Lectric on the National website and the strings JR gave me were too light by comparison. So I ordered online a set of the recommended Reso-Lectric strings, as seen on the right. Ordinarily, I might buy strings from my local shop as they are priced competitively; however, they along with every other guitar shop I’ve been in do not carry Pearse strings. I’ve used them on all my resonators and they must always for ordered in.
Taking advantage of the fact that my wife was away working, I set up the dining room table as my guitar maintenance/string changing site and a photo of it can be seen below:
In the foreground above you will note the guitar resting on a MusicNomad rubber mat and neck rest. For years I worked on my guitars without a mat and neck rest, but I learned quickly after purchase that this is really the only way to fly! Behind the guitar are numerous tools I set out to do the job properly… Let’s take a closer look below:
Tool array for guitar string change and routine maintenance
Moving left to right above:
Dave’s Guitar Shop wipe towel which was swag thrown in by Dave with the guitar purchase. Useful for wipe down during cleaning.
Ernie Ball Power Peg Pro makes winding the tuner pegs during string change so much easier and more efficient than one of those rotating hand winders. Takes a little getting used too and should be used with caution around Pearloid tuning pegs.
Electrician’s tape to hold the strings into the guitar’s tailpiece during the wind-up.
MusicNomad Tune-It lubrication for the nut. This will be the first time I ever use this stuff. I noticed during tuning of the original strings that a couple of them seem to hang up a bit riding through the nut. Perhaps this will help.
Microfiber wipe towel. Can’t have too many wipes during guitar maintenance.
Fender Bulletguitar tuner to get those new strings where they need to be.
Small diagonal wire cutters to trim the string. Pretty essential unless you want to circle them up like Bob Dylan did on the cover of Nashville Skyline..
Taylor Guitar Polish to clean up wooden surfaces. I think MusicNomad makes this stuff.
Dunlop 65 Fretboard Conditioner. Mostly lemon oil with a nice applicator. Not necessary for every string change, but this guitar has a nasty looking fretboard from hanging out in a store for many months!
MusicNomad Tool Set. Various screw drivers and wrenches for “just in case” something requires tightening. Just used it the other day to open the rear battery cover on this axe. A very handy collection.
Martin Simpson’s A Closer Walk with Thee which is a lovely cd of guitar instrumentals based on old American Gospel tunes. This in the background music to keep me calm during string change which can be a little never wracking if the strings misbehave.
So… let’s change the strings on my Reso-Lectric… shall we?
Backwinding the strings. Note the string loosening up.
Step One: Using a string winder like the Power Peg Pro, back wind the tuning pegs until the strings can be removed from the peg and later the tailpiece. Because I want to clean the fretboard, I will remove all the strings; however, some people might remove just half the strings and replace them before doing the other half. The decision may also depend on the bridge that you are using. For example, with a Bigsby, I would only do at most half the strings… perhaps, just one at a time.
Tailpiece and biscuit region of the guitar. Here the strings have all been removed.
Removing the string from the tailpiece on a National resonator is easy as it pops right out of the slot. There are no pegs holding the string down as is common on an acoustic guitar. A bit of caution is required getting the old string through the bridge/biscuit area because it is protected by an overarching hand guard. You wan to avoid damaging the soft wood biscuit or moving it around. I often cut the string in two pieces which makes removal from the biscuit region much easier.
Step Two: Clean the fretboard. You will note how grungy the fretboard was. Perhaps a customer who played this guitar at Dave’s before I got to it was eating a Twinkie and it was all over his hands…
Applying the fretboard conditioner down the neck.
Next I applied the Dunlop fretboard conditioner down the entire neck. This is the first time I used this product and its great. There is a pressure sensitive wick that wets out with conditioner with a downward push and applies easily with a simple wiping motion.
After application of the condition, it must be buffed down with a soft microfiber cloth or cotton rag. The grunge on the fretboard I was dealing with was quite tenacious and required some serious buffing to finally get it removed!
Buffing the fretboard after application of conditioner.
Strings laid out and ready to go.
Step Three: After the fretboard is cleaned it’s time to wind on the new strings. I like to remove the individually wrapped strings from the main package and lay them out arranged coarse to fine. The heavier strings are usually easiest to manage and might as well get them out of the way first.
As seen below start by running the string through the biscuit region and then slip the string into the tailpiece hole/slot. I found out from experience that unless tension is kept on the string it will most assuredly pop out of the tailpiece. It’s near impossible to keep tension on the string while you are winding up at the head stock, so I find that a piece of electrical tap laid over the tailpiece works wonders in keeping the string properly positioned.
On the left the string is located in the tailpiece. On the right you can see a strip of electrical tap holding the string in place.
Below, you can see a side shot of the biscuit underneath the guitar’s hand rest that sits above and protects it. The wooden biscuit transmits the string’s vibrations down to the aluminum cone to which it is glued, consequently creating the characteristic resonating sound known for these guitars. In the case of the Reso-Lectric there is also a piezo pickup located underneath the biscuit region of the cone. You can see that the biscuit is a saddle and has six differently sized grooves cut in it to accommodate the path of the strings, so it is important to make sure the string rests in its appropriate groove when winding it to proper tension. In this image the largest string can be seen on the right resting in its groove.
Sideview of the biscuit with large string resting in its proper groove.
Measuring out the string length to wrap around the tuning post.
It’s very important to get enough wraps of the string around the tuner post to keep the string in place when tuning the guitar. In the image to the left, I have the largest diameter string pulled through the post and am measuring off a section of string about the length of the next post. There should be no slack in the string between the tailpiece and the tuning post! This distance is a good rule of thumb; however, as the diameter of the strings progressively shrink in size, I will extend the string out a bit more to increase the number of wraps around the tuning post.
String bent at point of desired overall length before winding
After I’ve measured out the proper string length for the wind, I will then back the string off to the chosen end point, controlling the now slackened string with my right hand. What I like to do now is bend the string at the post and then wind the slack up around the post using my power winder in my left hand. I keep tension on the string with my right hand until the slack winds out. The aforementioned bending of the string is a great trick for controlling the string and keeping it from popping out of the tuning post as it winds on. Often I will have to bend the long tail end of the string upwards out of the way as it winds around the post to keep it from tangling or beating up the guitar’s head stock!
You can see the tail end bent upwards out of the way as the wind-on commences. Note the coils moving downwards.
I recommend winding the string with the string winder until the slack is gone and there is a modest amount of tension on the string. As you get to the finer strings it is easy to overwind and break them so some caution is required. The coils wrapping around the post should move downwards from the post hole toward the surface of the headstock. If proper tension and guidance of the string is not done, it is quite easy to tangle up the winds.
Making the final cut.
Finally, after the string is wound on to proper tension, it’s time to cut off the slack with wire cutters like the small diagonal side cutter I use. I cut the string pretty close to the post because the cut end can be a bit sharp and you don’t want to stab yourself later if you brush your hand over the headstock. I suggest 1/4 to 1/8 inch (3 to 6 mm) extending from the post hole. If the cut end is pointing upwards, I will gently push it down to horizontal with the lead end of the wire cutter.
Starting the replacement of the second string.
As you can see in the image to the right, I repeat the string replacement steps until all six strings are wound on. Note that, I peeled back the electrician’s tape to begin the wind of the second string. I will continue to work my way across, peeling and then replacing the tape to hold the strings down into the tail piece. The adhesive on the tape is robust enough to hold throughout the process.
Proper string wind orientation.
Here in the image to the left I am measuring out the string length for the upper most post on the headstock. I am guesstimating the proper length since there is no post above to use as a reference point. Also note, very importantly, that the wound strings come off the post towards the inner part of the headstock for best alignment within the guitar so choose your winding direction accordingly!
Strings lining up properly in the nut.
When the strings come off the posts in the proper orientation as mentioned above they line up nicely in the nut, which makes tuning accuracy more probable. The last step before final tuning is to gently stretch the strings. Note below the I use my left hand to pull upwards on the string and with my right, I gently old the strings in place so that they do not pop out of the biscuit grooves. It is possible to overstretch the finer strings and break them so use some caution. After stretching, I will tune the strings. I go through the stretching/tuning process three to four times before the strings stabilize. As Carlos Santana says, “You got to let the strings know who is the boss!”
Gentle string stretching on above left and above right holding the strings down in their biscuit grooves
For best accuracy I use an electronic tuner to get my strings to proper pitch. I never had the ear to tune strings, so the tuner for me is an absolute requirement. I own multiple tuners like the Fender Bullet below left but find the clip on tuners sometimes non responsive, which is frustrating. My best go-to tuner is the Boss TU-3. It always delivers. Of course you must have a guitar that you can plug-in to use a TU-3! I tune to standard EADGBE for starters, but tune down to Open D for bottleneck work on the Reso-Lectric, which is DADF#AD.
Two methods for electronically enhanced tuning. If I can, I will use the Boss TU-3.
Step Four: Wrapping things up… so, we’re almost done… as I mentioned earlier in this blog, I decided for the first time ever to use some lubrication in the nut grooves to enhance the ease of tuning… sometimes a wound string can “hang up” in the nut creating unwanted tuning errors. I suppose the grooves in the nut could be routed out a bit, but I think trying lubricant is the least aggressive approach to this minor problem.
Applying some slick ’em to the nut grooves to enhance tuning ease.
Applying the lubricant is pretty painless. It is a viscous vaseline-like fluid that I squeezed into a small bowl and then daubed a micro brush into it and subsequently wiped it into the nut groove. I loosened the strings enough to lift them out of the way during application and then re-tuned afterwards. So far, tuning accuracy seems a bit better now!
And then the last step… Applying some guitar polish and a final buff down:
After a 2.5 hour trek across frozen farm country in Iowa and Minnesota, I cross the Mississippi River into Wisconsin and spend several hours at one of the preeminent guitar stores in the U.S.
My first resonator… A steel NRP…
I play finger-style country blues and those of you who’ve read this weblog know that… I take lessons at my local shop which is an excellent guitar store and the community is blessed to have it… After one of my lessons a couple of years ago, I decided to noodle around with a resonator guitar and the shop had a modestly priced Fender that I picked up and tried out.
The Fender was a wooden bodied resonator with nice low play so that fingering the guitar was quite easy. I played through a few of old country blues tunes on the resonator and was smitten. I loved the bonk and splang of the guitar. I decided then that I would acquire a resonator, and guitar snob that I am, I was not inclined to purchase a Fender… Instead, I wanted a National because those guys invented the resonator… Well… it’s a little more complicated then that… I think the National/Dobro company that originally produced the resonator went out of business for some years, and was reconstituted as a manufacturer of resonators in 1989, but for all intents and purposes, it’s symbolically and culturally the same company, as they build their guitars just like in the old days and have added new innovations too along the way…
Mr. Catfish Keith playing a Tricone (from his website)
Fortunately for me, eminent country blues performer, award winning recording artist and resonator aficionado Catfish Keith gave me some basic beginner’s points on shopping for a resonator. He recommended a single cone guitar that fell into the Duolian or Triolian class as a good place to start. Keith also is a representative for National Guitars and will sell you anything in their product line. At this point, I was thinking a pre-owned instrument was my best choice to save some money and thanked Keith for his help.
National guitars were not to be had in Cedar Falls, IA, so I jumped into Reverb world for the first time and found a pretty good deal on a “mint” steel bodied NRP Black Rust that was designed to emulate the original Duolian steel guitar that famous bluesmen like Son House played. It was perhaps a bit too adventuresome on my part to buy an NRP without ever having played one, and when it arrived I was appalled at how high the “action” or string play from the fretboard was and how heavy the instrument settled onto my lap. To save my life, I could not fret the neck properly to play finger style on the NRP and was pretty distraught until I decided I would learn to play bottleneck style to justify the purchase!
National Reso-Rocket WB with Hot Plate pickup
Now, I really like playing bottleneck and will always remember that the NRP led me down that path… I was so enthused by bottleneck playing, I decided to broaden my tonal range by purchasing a wooden bodied resonator and again through Reverb received a “mint” conditioned National Reso-Rocket WB (wood body). I loved this guitar to the point that I rarely picked up the NRP anymore, and when I did the splanky overly metallic sound compared to the woody/mellow toned Reso-Rocket put me off…
Recently when my guitar teacher learned I wanted to dump the NRP, he was initially apoplectic, defining the NRP as one of the “coolest” guitars ever; however, after hearing me play my WB and also playing it himself, he thought it was a more natural axe for me given my style and sentiments.
So, recently I tried to sell the NRP by consignment at my local shop, but that did not work out… I concluded after a brief experience that there was a low probability of selling an expensive resonator in Cedar Falls. I took the guitar back home to keep, but it sat there barely being used like a sore tooth and I eventually took another route to rid myself of it.
Some years earlier, I was informed by the local guitarati that a wonderful guitar shop (Dave’s Guitar Shop) existed in La Crosse, Wisconsin that not only had a huge selection of guitars (over 2500 according to their website), but in addition, Dave has an enormous personal collection of specialty guitars (over 500) on display up on the second floor that contains some of the most interesting and rarest guitars and amplifiers on the planet Earth.
Besides being a leading dealer for Gibson, Fender, Martin, Gretsch, Taylor, National and PRS etc., Dave’s also has a brisk trade in used and vintage guitars. In fact, they have a no muss/no fuss electronic form to submit to get an estimate of the trade value for your guitar, which is I what I did last Sunday night for the NRP.
The very next day, they offered me a straight cash exchange or a better deal if I rolled the money over into a new purchase. So, being retired and healthy and having all the time in the world, I took off on a cross country drive the next day to visit Dave’s Guitars. Fortunately, for me the terrible weather over the past several days had abated temporarily so I had safe driving for the 2.5 hour trip.
Two lane blacktop through Iowa & Minnesota frozen farmlands…
Frankly, 2.5 hours through frozen tundra was a long drive, but it was exciting to finally cross the Mississippi into Wisconsin, enter La Crosse, and find the guitar store practically on the riverbank. The shop itself is a substantial two story building. It was impressive from the outside. I was told by my contact, a fellow identifying himself as JR to find him in the “acoustic room.”
Main floor at Dave’s… the electric guitar space…
So I entered through the double doors and landed in the electric guitar space. You can see in the image to the left, some of the Gibson ES models for sale. Well, I marched through the electric guitar space and was directed to the right side of the main floor where the acoustic room was.
Besides the store staff, I noticed mostly alte kakers (yiddish for old duffers) like me patronizing the store. One might conclude that lots of alte kakers play guitar and like to hang out where they’re sold!
Well… my man JR had to take care of a pair of alte kakers before he could meet with me, which was fine as I found a stool and took in the world around me. As you can see in the image below, I was surrounded by choice acoustic guitars, including, Collings, Santa Cruz, Gibson, Martin and Taylors. Not being in the market for an acoustic guitar because I own two lovely Taylors, my eyes sort of glazed over… the sheer number of high end, premium factory produced guitars was just overwhelming…
In fairly short order, I had the full attention of JR and the first thing he did was look over and “test out” the NRP whilst plugged into an acoustic amp. Then he went “all airline” and starting plugging away at his computer, until he made a final offer, which was actually higher than the initial one given to me the day earlier via email. I was pretty delighted and took the deal to roll the “offer” into a replacement guitar, either pre-owned or new depending upon how my search went. The guitars I was considering during my drive over were as follows: (of course only one would I purchase)
The National Reso-Lectric, because it looked and sounded as cool as a cucumber when I did some online research. Plus, Dave’s had a used and new one so I could compare them and I had a fascination for this unusual appearing and sounding axe. I will speak to this try out momentarily below.
The National M-1 Tricone Cutaway Wooden Body. As I said earlier, I already own a Reso-rocket WB, so I was concerned as to whether the M-1 sounded different enough to justify purchasing it. Further, I wondered how it could be amplified… my Reso Rocket WB has a hot plate installed and I want my guitars amplified when I perform. A tricone is more difficult to amplify and it’s probably expensive to do it well. Sadly, Dave’s just sold the last one in stock. It was a very cool guitar.
Gibson ES 335. I play finger-style country blues almost exclusively and this guitar is a semi-hollow bodied electric classic; however, I own a lovely Taylor T3 Custom (flamed maple) with Vintage Alnico humbuckers and I wondered if they are too close to each other to justify getting one. I actually tried one out. It was a pre-owned “Custom Shop” guitar at half the original premium price, and it was very, very nice, but it did not capture my imagination. Further, I was also surprised how grubby it was, which turned me off… Is that a thing? Selling vintage guitars in grubby form to make them appear more authentic? Bad form…
American Professional Strat. I do not own an electric guitar with single coil pickups though I have some that will split their doubled coiled humbuckers… As I said, I own the T3, and I own a Taylor T5z Pro which is very different from a Strat and finally I own a beautiful 2007 Taylor Solidbody Custom Walnut with mini humbuckers and a newly replaced neck… So the question was do I really need a Strat both for my own personal experience or to round out my stable of sounds? I decided at this moment no. I have enough electric guitars for the time being. If I ever buy a Strat one day, it will probably be at my local shop.
My tryout space where I could plug into a Fender Princeton Reverb, similar to one I own…
Now for the fun part of the trip. At my kind request, JR pulled out the used and new National Reso-Lectrics and found me an amplifier similar to one I have at home, procured a cable, let me plug-in, and then he left me to my own devices, suggesting I seek him out if I need any help or information. I greatly appreciated that he did not hover over me.
So, I picked up the used Reso-Lectric first as I really wanted to like it because it was considerably less money then a new one, and it was clean as a whistle. Sadly, I did not like it very much… It was thin, whiny and shallow sounding. Although it had nice low string play, which made for easy finger picking, it was unforgiving when I played with my brass slide. Too clangy… I tried a ceramic slide… no better.
I began wondering then if the Reso-Lectric was the guitar I had hoped it would be. It certainly sounded nice on some of the Youtube videos where I’d seen it reviewed, but this one was a bit of a dog! Perhaps it needed new batteries, or a reset, or pickup adjustments, but I did not have the time or patience to fight through that battle… I unplugged the used guitar and set it aside.
Then I picked up the new version of the Reso-Lectric and plugged in. It looked virtually the same as the used one aside from some finishing details on the headstock and the color of the plastic scratch plate and pick up cover. But, this guitar was very friggin’ different… it had a deep throatiness to it that was missing on the first one I tried… this guitar could go low and swampy, which is where I like to be! The play was still accessible for finger-style which delighted me; however, there was enough action to easily accommodate the slide too. With all systems go, I happily played through some of my Open D repertoire and the more I played it, the more I was convinced that this was the guitar I would walk out with…
When I was playing the new version of the Reso-Lectric a fascinating thing happened to me. Several of the old duffers hanging around the store came by and congratulated me on my playing! I was astonished because I was somewhat insecure playing out in the middle of one of the biggest and most discriminating guitar shops in the Midwest… One gentleman came by repeatedly, complimented my playing, asked for advice and told me how much he learned by our interactions! Wow… But the kicker, was when a store guy dropped by and told me that I reminded him of Ry Cooder’s Paris, Texas movie soundtrack referring to the slower, more languid and accurate playing of the slide that I was producing… He said that it was rare for someone to play like I was performing in the store. I was really taken aback and thanked him for his kind words…
I’ve not seen Paris, Texas but looked up a sampling of the soundtrack on Youtube, which I post below. It’s quite nice and appeals to me and I can see some similarity in how I approach playing slide. I am definitely not in the same universe as Ry Cooder, but it was nice to be compared to him in such a manner.
Ry Cooder doing the languid thing…
JR and I pose with the National Reso-Lectric… I am delighted…
After I played for quite a while, I decided to take the Reso-Lectric home with me and asked JR to prep it for sale. There was a bit of schmutz (yiddish for gunk) that he cleaned off on the shiny metal parts and he performed a slight adjustment to the neck.
It really is a fascinating looking instrument. There is an art-deco sensibility to the design and the control knobs remind me of a 1950’s era kitchen toaster! Combine the sunburst finish with the resonator cone cover and the aforementioned flourishes and you have a completely unique looking axe.
For all intents and purposes, the Reso-Lectric is a hybrid acoustic/electric guitar. The combination of an acoustic designed piezo pickup under the biscuit where the strings rest on the resonator cone, and the traditional electric P90 single coil up near the neck gives the player a fairly wide ability to influence the tone along the acoustic/electric spectrum. Combine the guitar controls with a Princeton Reverb Amp, echo delay, octaver, and tremolo pedals and it can create quite an alluring sound when played with a slide! Below you can see the guitar ready to go…
Take me home to Iowa…
If you’re interested in learning a bit more about the Reso-Lectric, I embedded below a factory tour of National Guitar focused entirely on the production of that particular guitar. The tour was done by a German outfit, so it begins in German language, but the tour itself is in English!
One of the rituals involved with visiting and/or shopping at Dave’s Guitars is to ascend to the second floor where Dave’s personal collection of historic, rare, and unusual guitars exists. This I decided to do and I took some shots which I post below. The sheer number of guitars and amplifiers is overwhelming. I knew I was in the midst of guitar history and museum quality greatness but did not have the wherewithal to take it all in, but it was fun to be up there for a while to wander around in awe… Sadly, I did not get to meet Dave himself, but if you scroll down below my shots of the collection there is a 45 minute interview with Dave and a detailed tour of the collection hosted/conducted by Premier Guitar Magazine… It’s worth the viewing if you have the time and the interest.
Some shots of Dave’s historic guitar collection
Below is the Premier Guitar Magazine interview with Dave of Dave’s Guitars:
Was the visit to Dave’s Guitar shop worth it? You Betcha!